# Cách cài đặt Synology trên máy ảo vm proxmox với ARL Loader
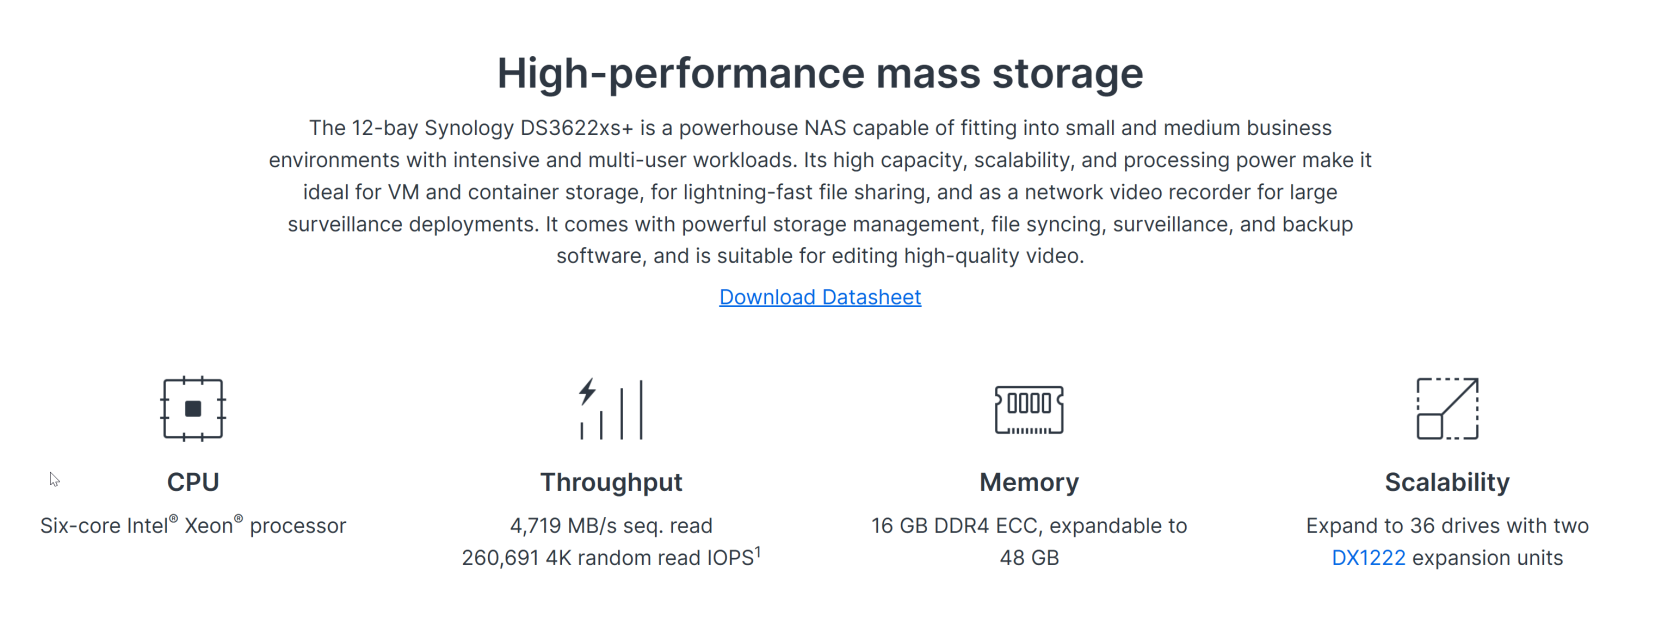
Cấu hình:
[](https://wiki.kyluat.com/uploads/images/gallery/2025-01/K2aimage.png)
[](https://wiki.kyluat.com/uploads/images/gallery/2025-01/MD5image.png)
Network sau khi cài:
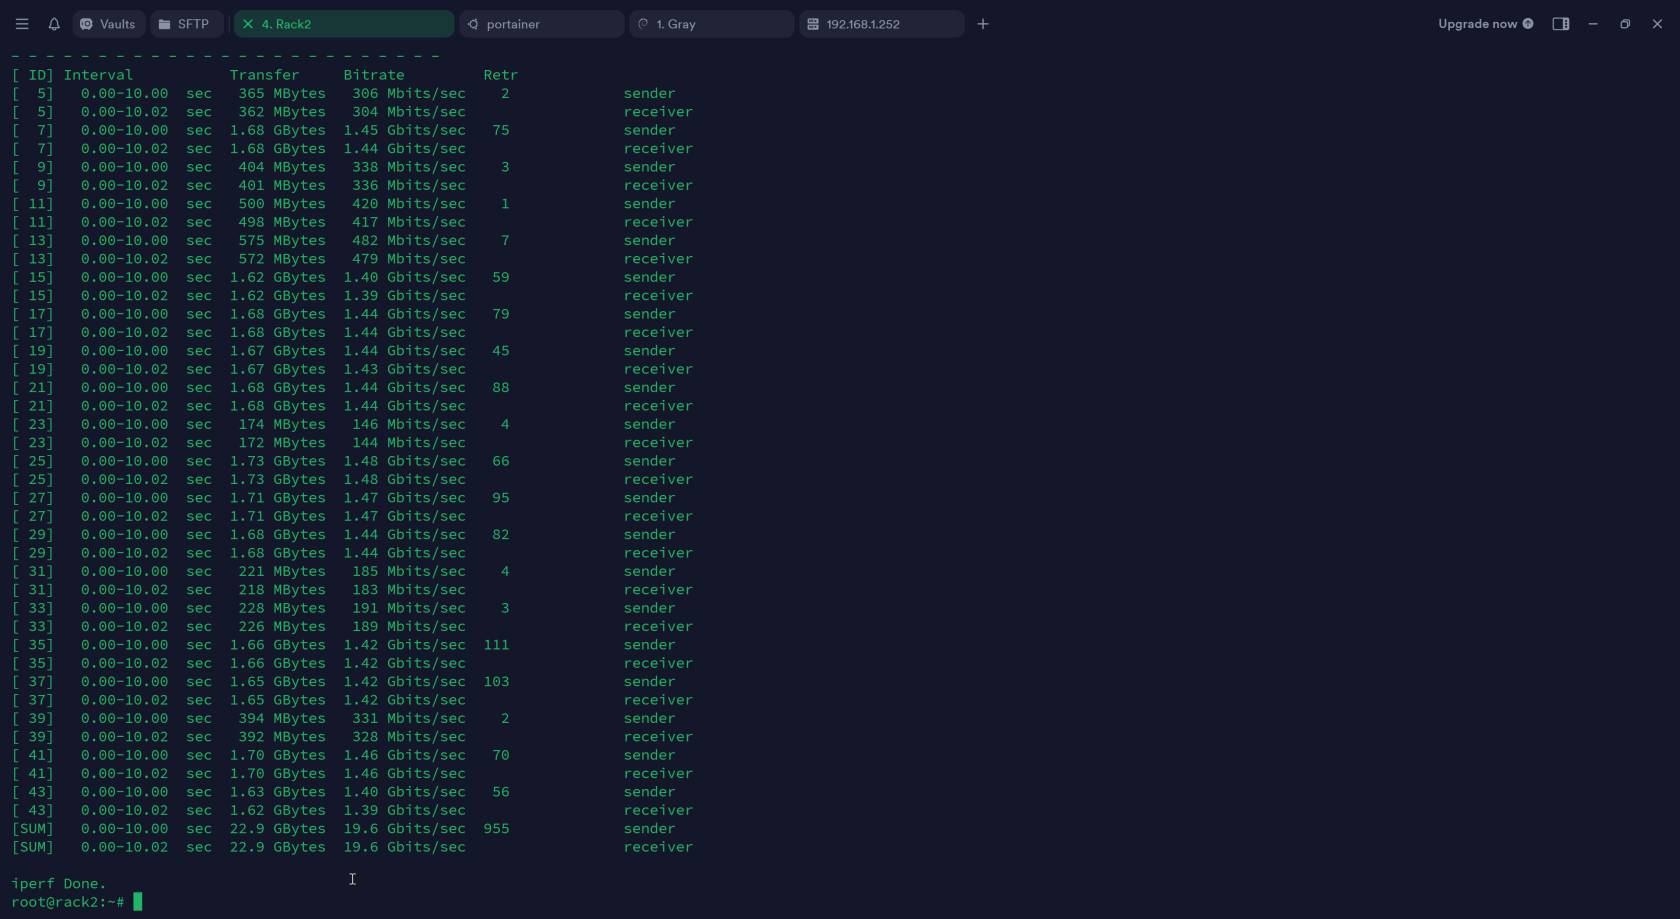
Test với với network của node proxmox host của synology tới synology:
[](https://wiki.kyluat.com/uploads/images/gallery/2025-01/M1gimage.png)
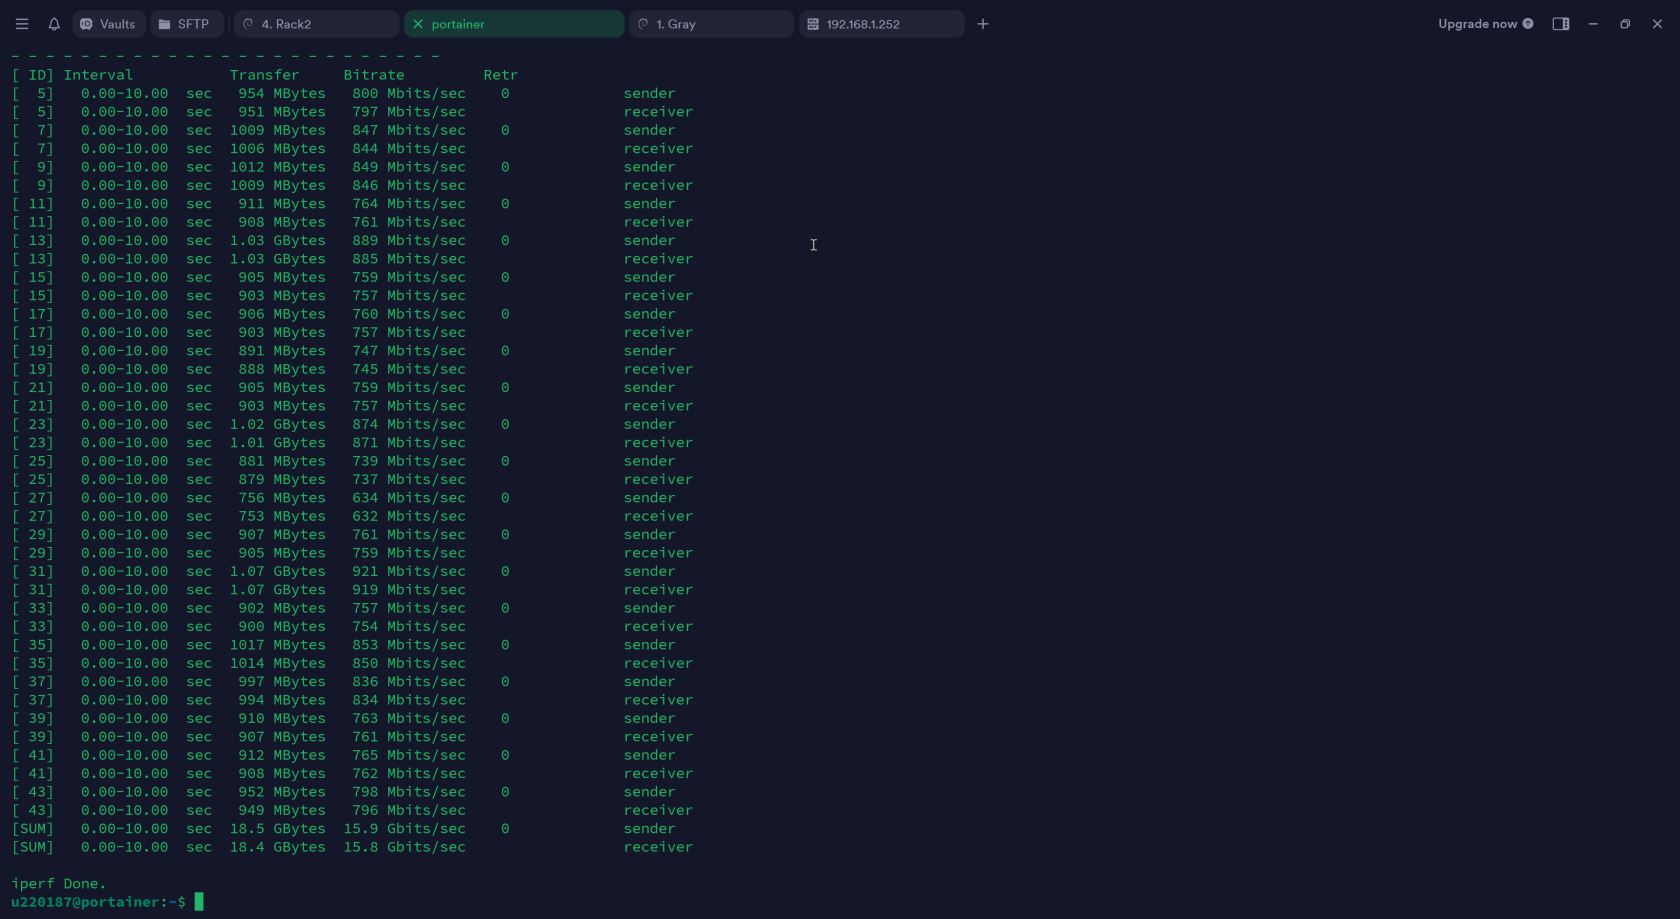
Test với network của VM trong cùng host với synology:
[](https://wiki.kyluat.com/uploads/images/gallery/2025-01/Ng2image.png)
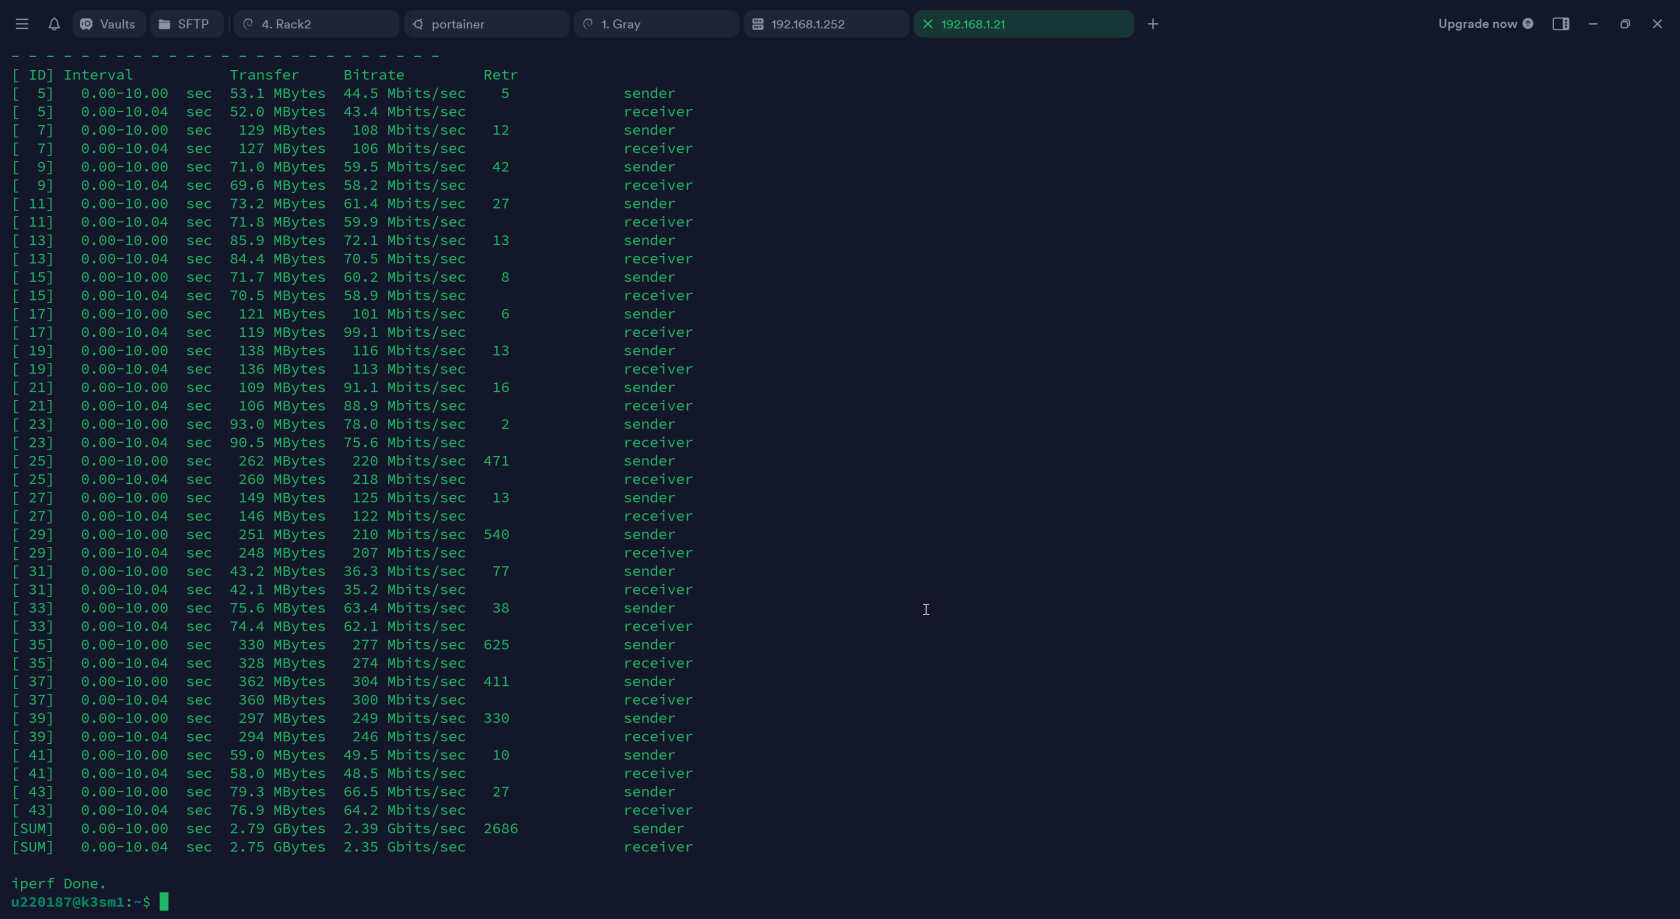
Test network từ một VM của Node Proxmox khác tới Synology
[](https://wiki.kyluat.com/uploads/images/gallery/2025-01/yiZimage.png)
Cấu hình VM:
[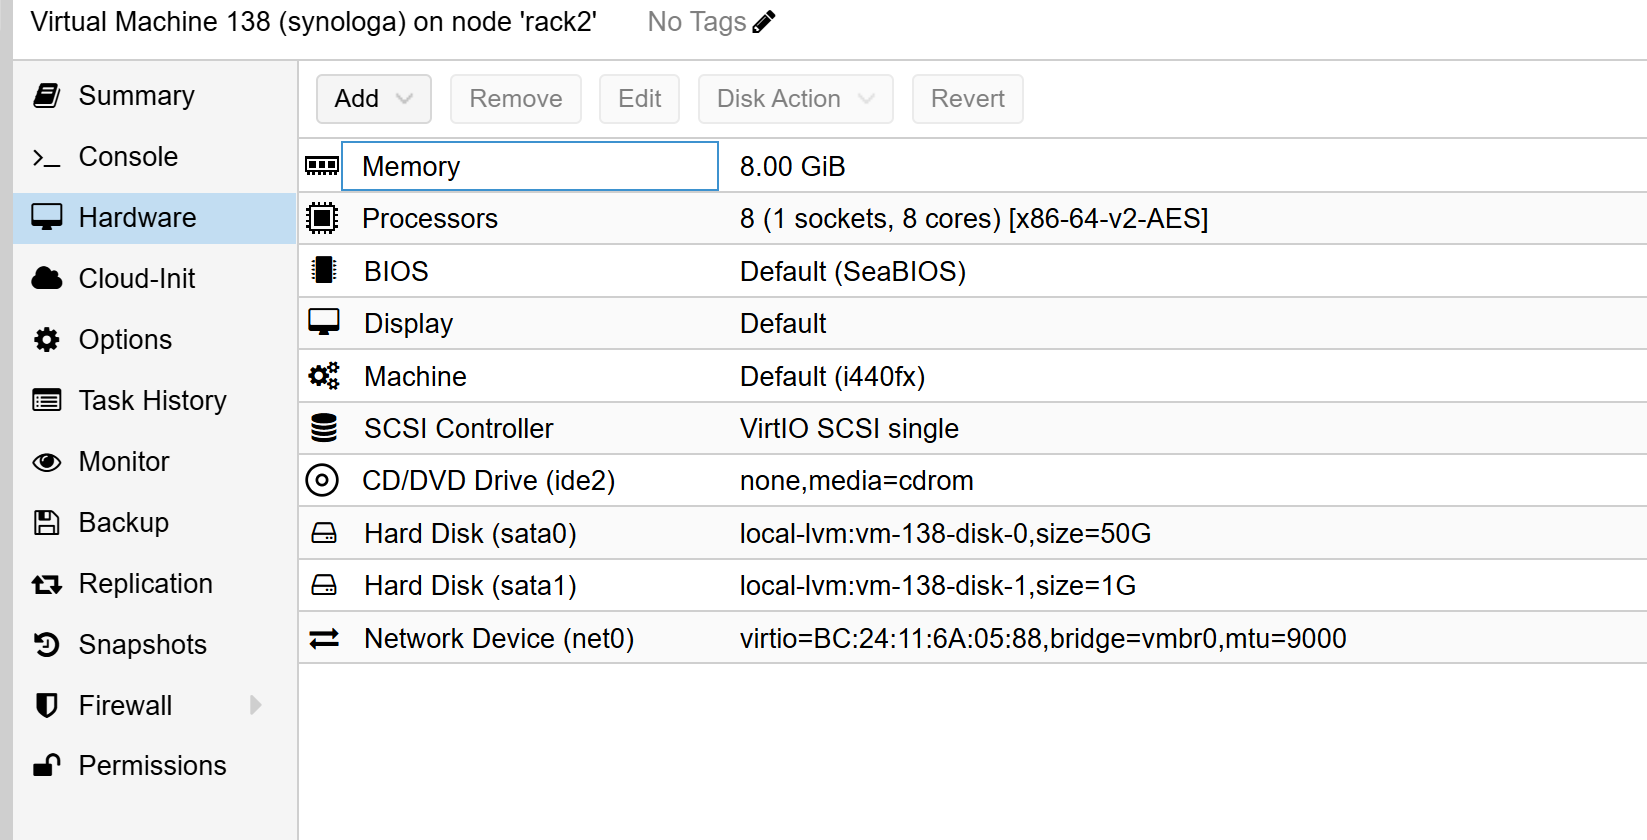](https://wiki.kyluat.com/uploads/images/gallery/2025-01/eRZimage.png)
Cách cài đặt:
Search google "arpl release" :
[https://github.com/fbelavenuto/arpl/releases](https://github.com/fbelavenuto/arpl/releases)
kéo xuống và note lại link download : arpl-\*\*\*\*\*\*\*\*.img.zip
ví dụ: [https://github.com/fbelavenuto/arpl/releases/download/v1.1-beta2a/arpl-1.1-beta2a.img.zip](https://github.com/fbelavenuto/arpl/releases/download/v1.1-beta2a/arpl-1.1-beta2a.img.zip)
link này là link image để tạo boot như usb vậy. tí nữa sau khi cài cấu hình vm thì insert boot disk vào vm.
vào proxmox và tạo 1 vm với cấu hình sau:
```
OS: Do not use any media
DISK: Bus/Device SATA , 50 GiB min
CPU: Cores 8
MEMORY: 8192 MiB
NETWORK: Model: Intel E1000
```
Confirm để tạo VM
Tiếp tục, SSH vào Node Proxmox ( Host )
Đánh từng lệnh sau để download booter arpl về host:
```
wget https://github.com/fbelavenuto/arpl/releases/download/v1.1-beta2a/arpl-1.1-beta2a.img.zip
```
Link này là link download ở trong [https://github.com/fbelavenuto/arpl/releases](https://github.com/fbelavenuto/arpl/releases)
Sau khi download xong thì Unzip nó ra với lệnh sau:
```
unzip arpl-1.1-beta2a.img.zip
```
Kế tiếp, qua proxmox web ui xem VM ID vừa tạo, ở đây tôi tạo VM với ID là 138 thì ghi lệnh sau:
[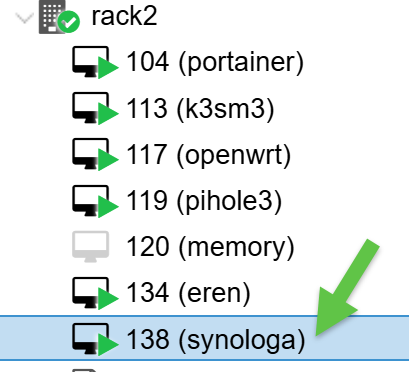](https://wiki.kyluat.com/uploads/images/gallery/2025-01/h47image.png)
```
qm importdisk 138 arpl.img
```
Tiếp tục vào Web UI của Proxmox để config VM 138 đó:
Chọn Hardware > Bên dưới có Unused Disk thì double click vào, kiểm tra coi có phải đang xài SATA không, nếu mặc định là SATA thì cứ nhấn ADD/OK vào.
Chọn Options > Boot Order > Kéo sata1 dưới cùng lên đầu > check vào checkbox để enable > OK
Ok, Done. Xong bước này thì nên clone 1 bản VM ra và convert qua Template để khi nào cần cài thì cứ Clone template đó ra mà cài tiếp.
Start VM rồi vào Console để xem IP Address Boot Loader tạo:
Ví dụ: [http://192.168.1.xxx:7681/](http://192.168.1.xxx:7681/)
[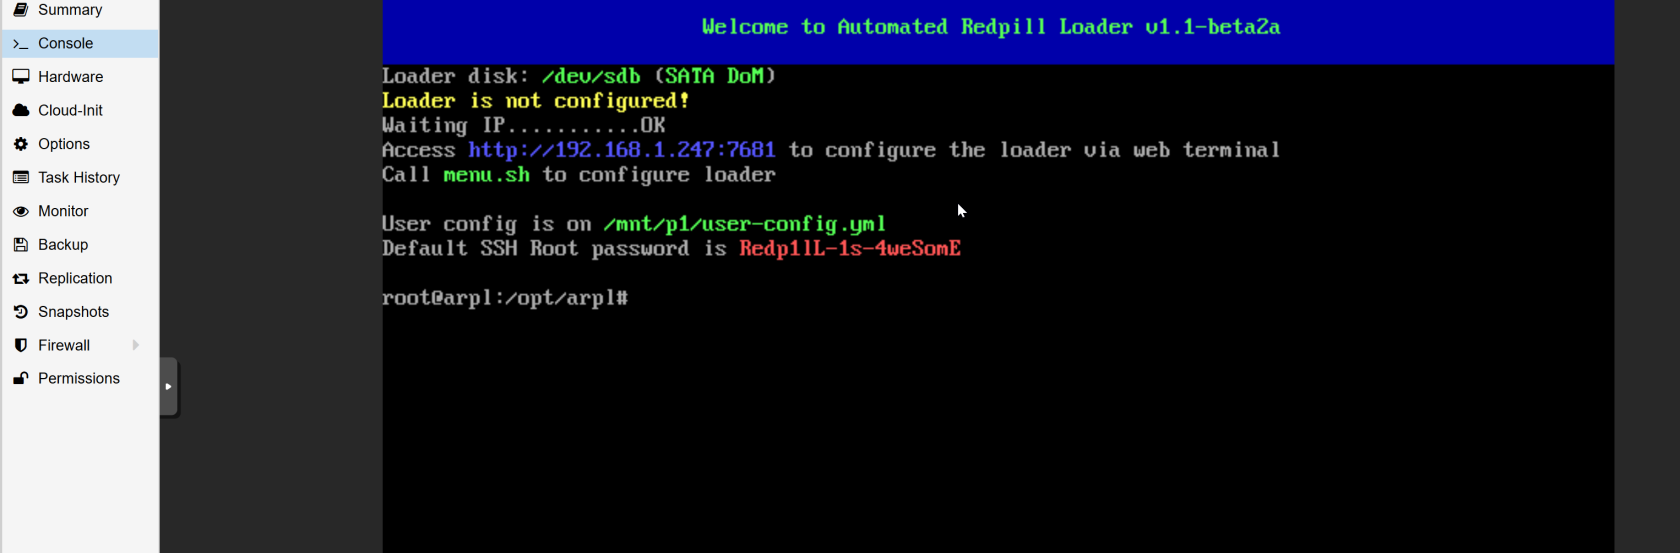](https://wiki.kyluat.com/uploads/images/gallery/2025-01/v4jimage.png)
Vào website đó trên trình duyệt:
[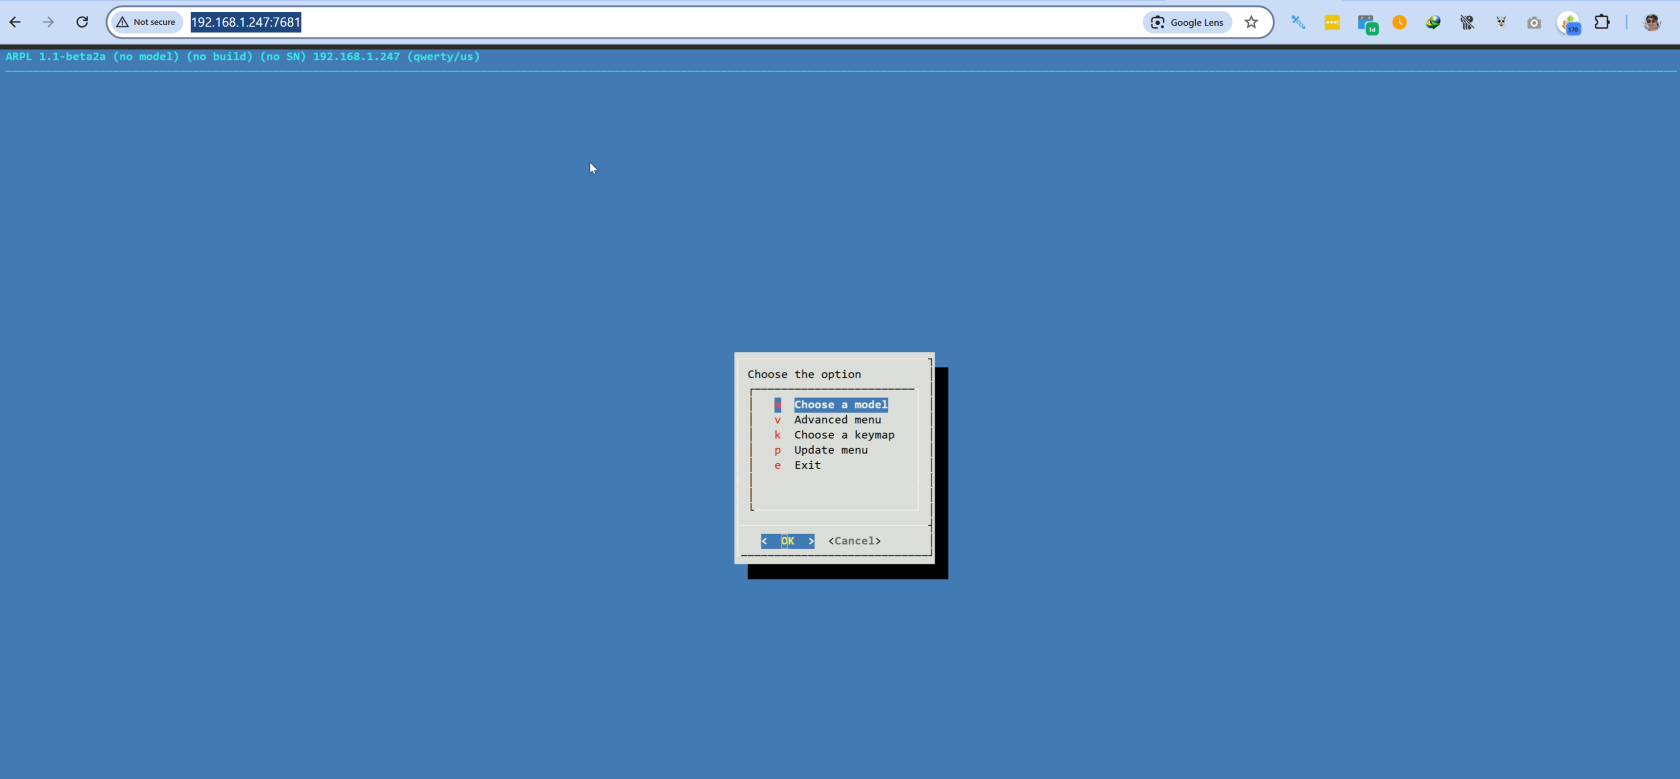](https://wiki.kyluat.com/uploads/images/gallery/2025-01/yknimage.png)
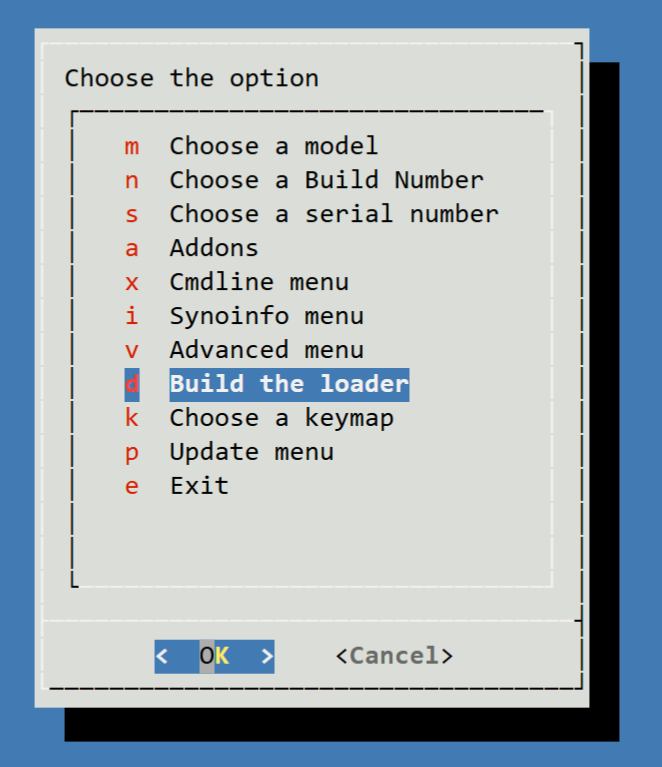
```
choose model > OK > DS3622xs+ Broadwellnk > OK
choose a Build Number > 42962 > OK
choose a serial number > Generate a random serial number > OK
build the loader > OK
```
[](https://wiki.kyluat.com/uploads/images/gallery/2025-01/Mkfimage.png)
Đợi xíu cho nó build xong rồi quay trở lại ...
Đợi boot loader load xong rồi quay lại nhấn tiếp
[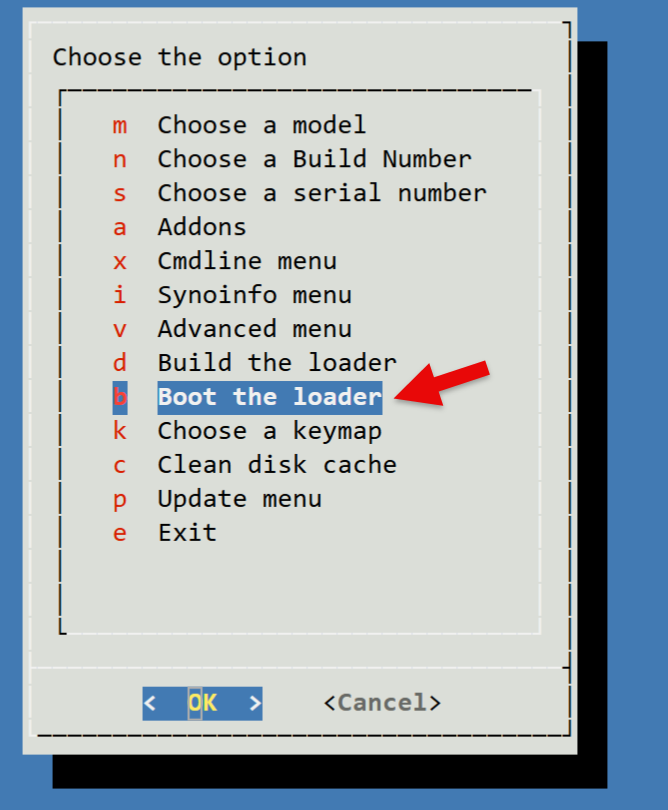](https://wiki.kyluat.com/uploads/images/gallery/2025-01/lrFimage.png)
Boot the loader > OK
Xong rồi đó, mở 1 tab khác, copy cái link của boot loader menu qua rổi đổi port thành 5000:
[http://192.168.1.247:7681/](http://192.168.1.247:7681/) -> [http://192.168.1.247:5000/](http://192.168.1.247:5000/)
[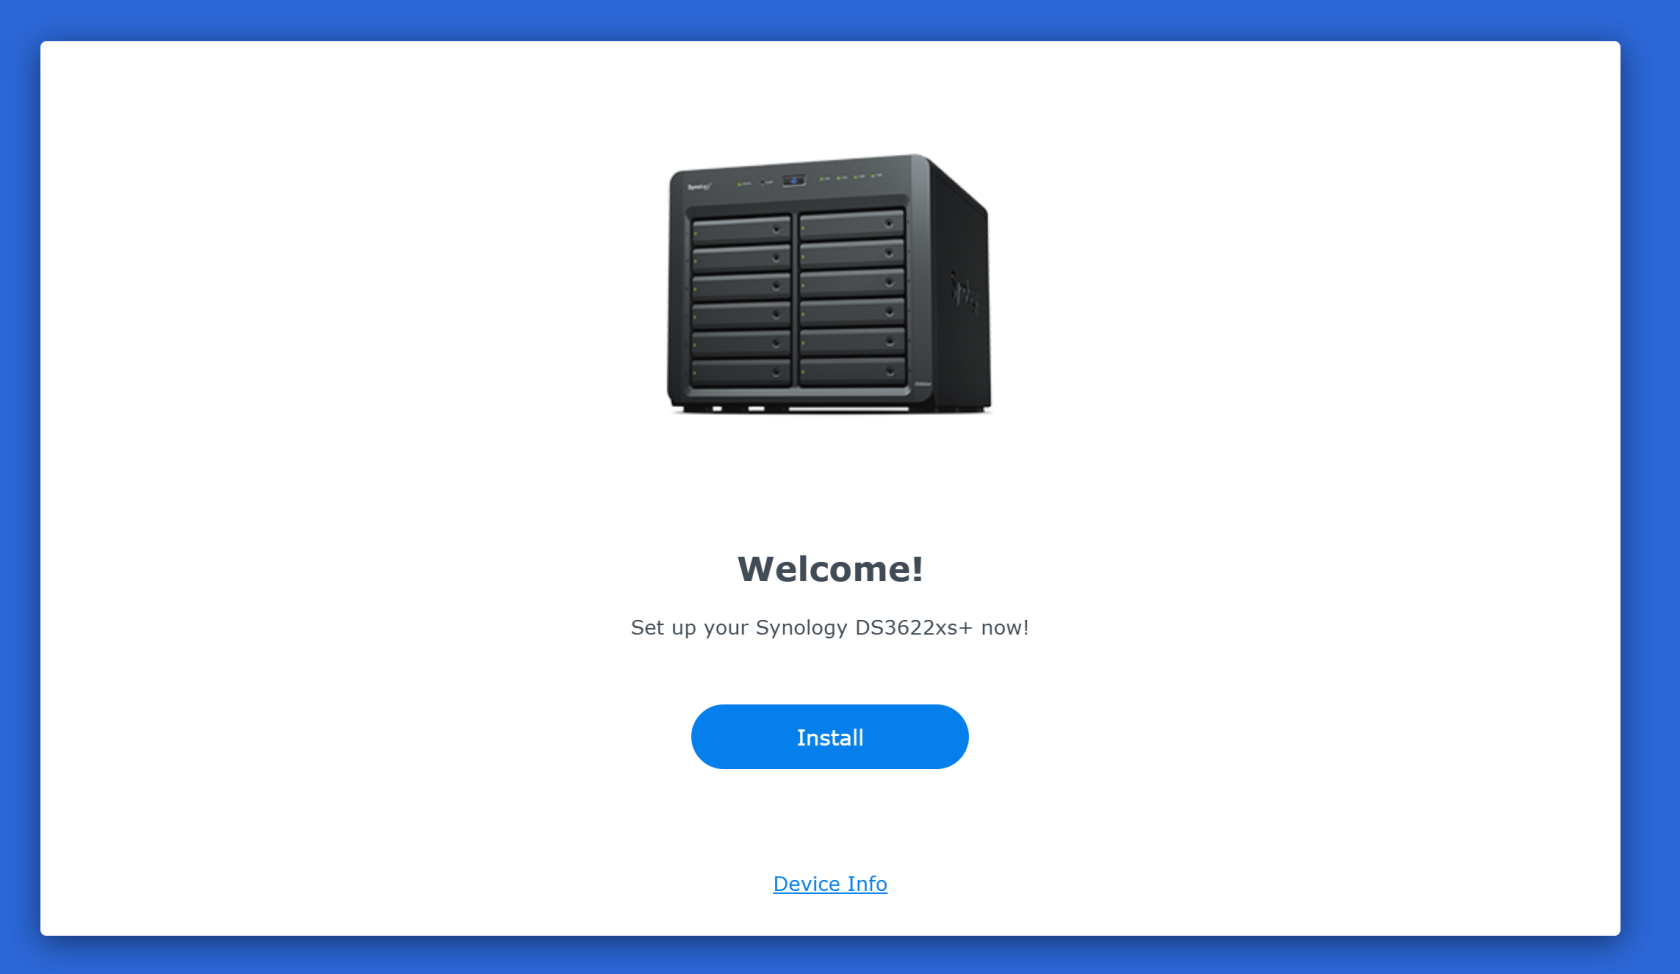](https://wiki.kyluat.com/uploads/images/gallery/2025-01/ZBJimage.png)
vào trang này để download file pat về: [https://www.synology.com/en-global/support/download/DS3622xs+?version=7.1#system](https://www.synology.com/en-global/support/download/DS3622xs+?version=7.1#system)
chú ý là DSM 7.1.1 và DS3622xs+
[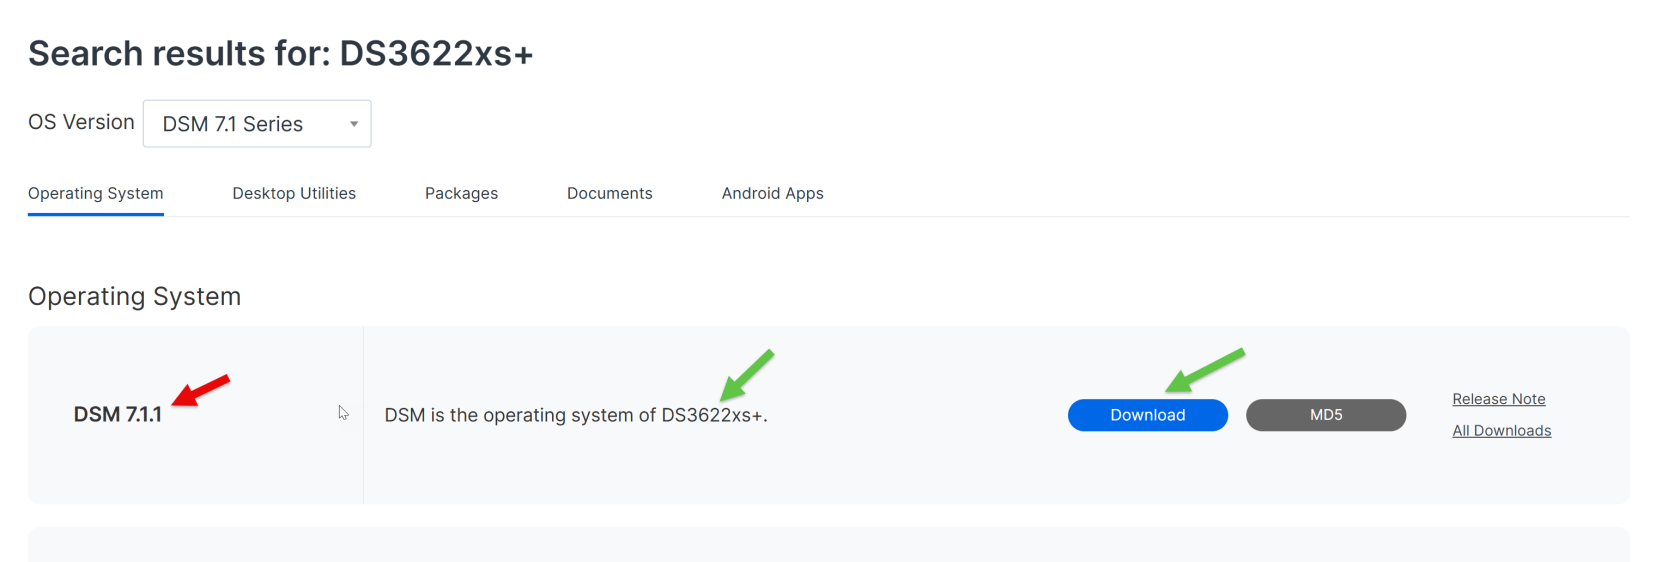](https://wiki.kyluat.com/uploads/images/gallery/2025-01/7Ylimage.png)
[https://global.synologydownload.com/download/DSM/release/7.1.1/42962-1/DSM\_DS3622xs%2B\_42962.pat?model=DS3622xs%2B&bays=12&dsm\_version=7.1.1&build\_number=42962](https://global.synologydownload.com/download/DSM/release/7.1.1/42962-1/DSM_DS3622xs%2B_42962.pat?model=DS3622xs%2B&bays=12&dsm_version=7.1.1&build_number=42962)
Filename sẽ giống thế này: DSM\_DS3622xs+\_42962.pat
[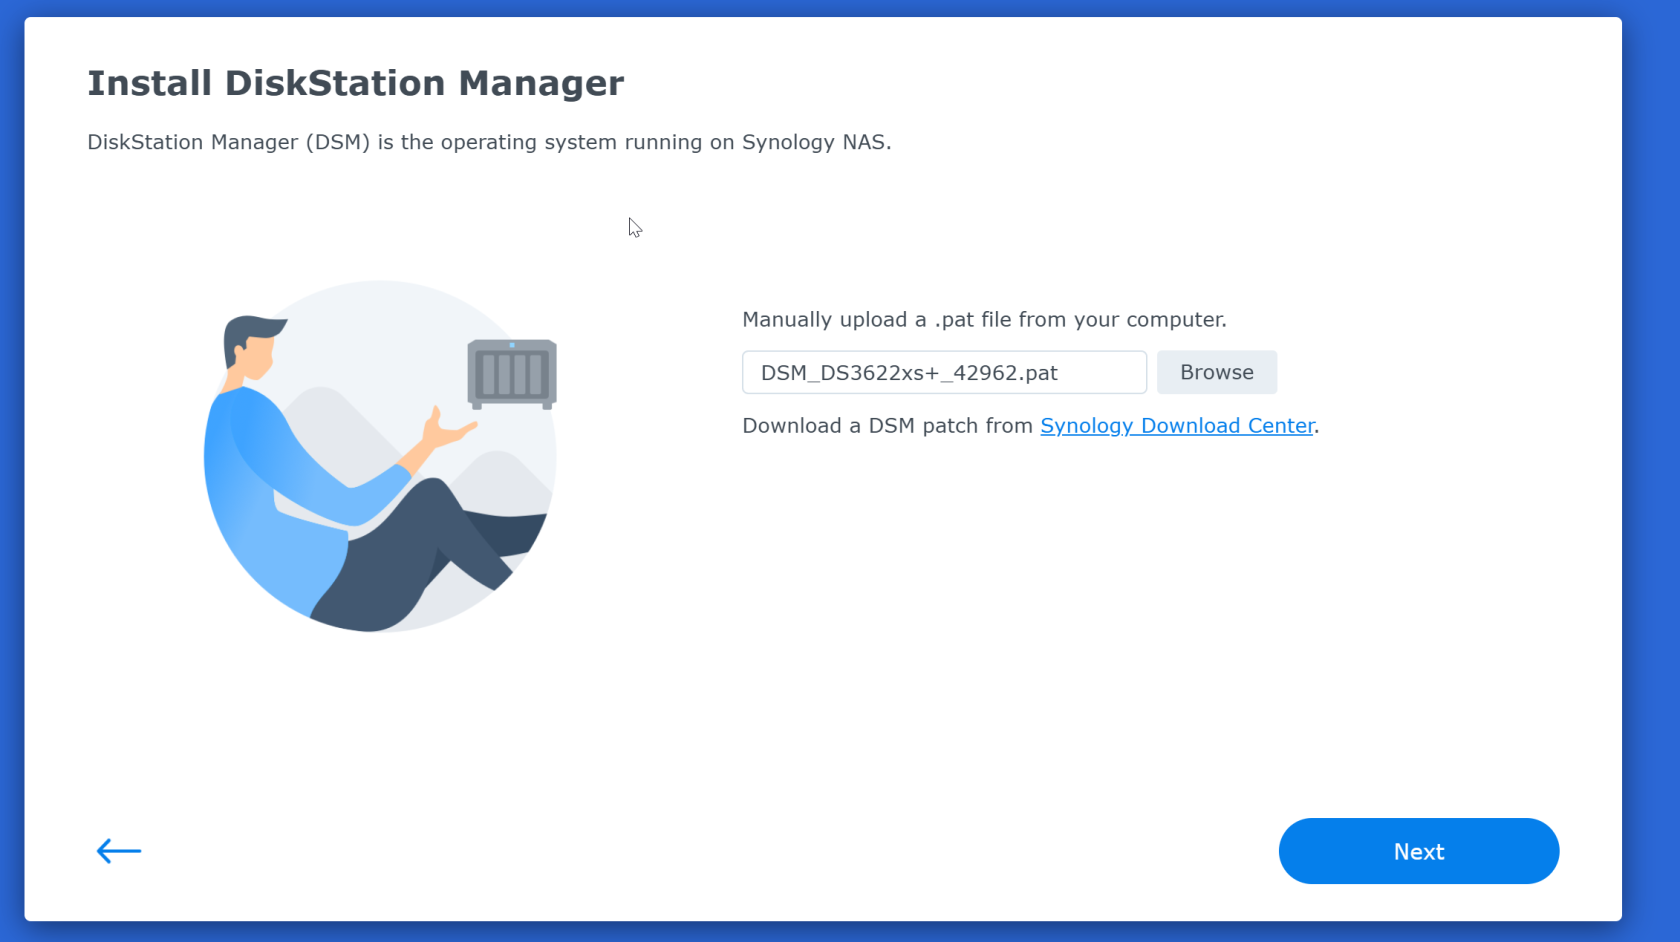](https://wiki.kyluat.com/uploads/images/gallery/2025-01/GIbimage.png)
Click next
[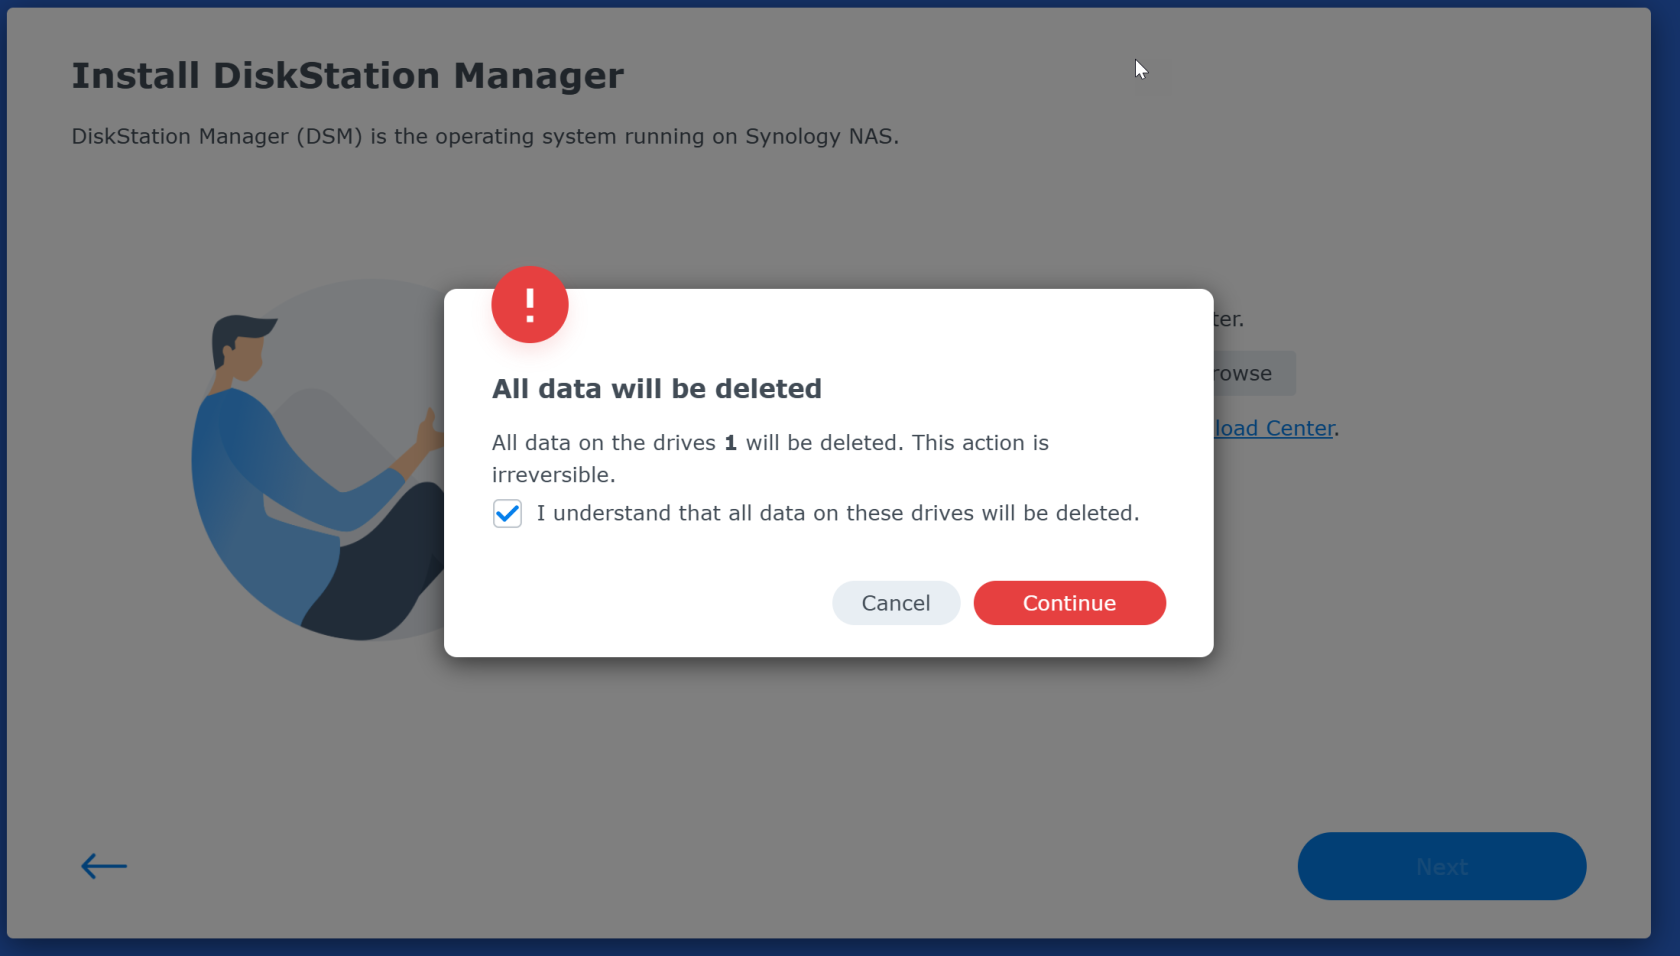](https://wiki.kyluat.com/uploads/images/gallery/2025-01/BOXimage.png)
Check vào I Understand ... và Click vào Continue
[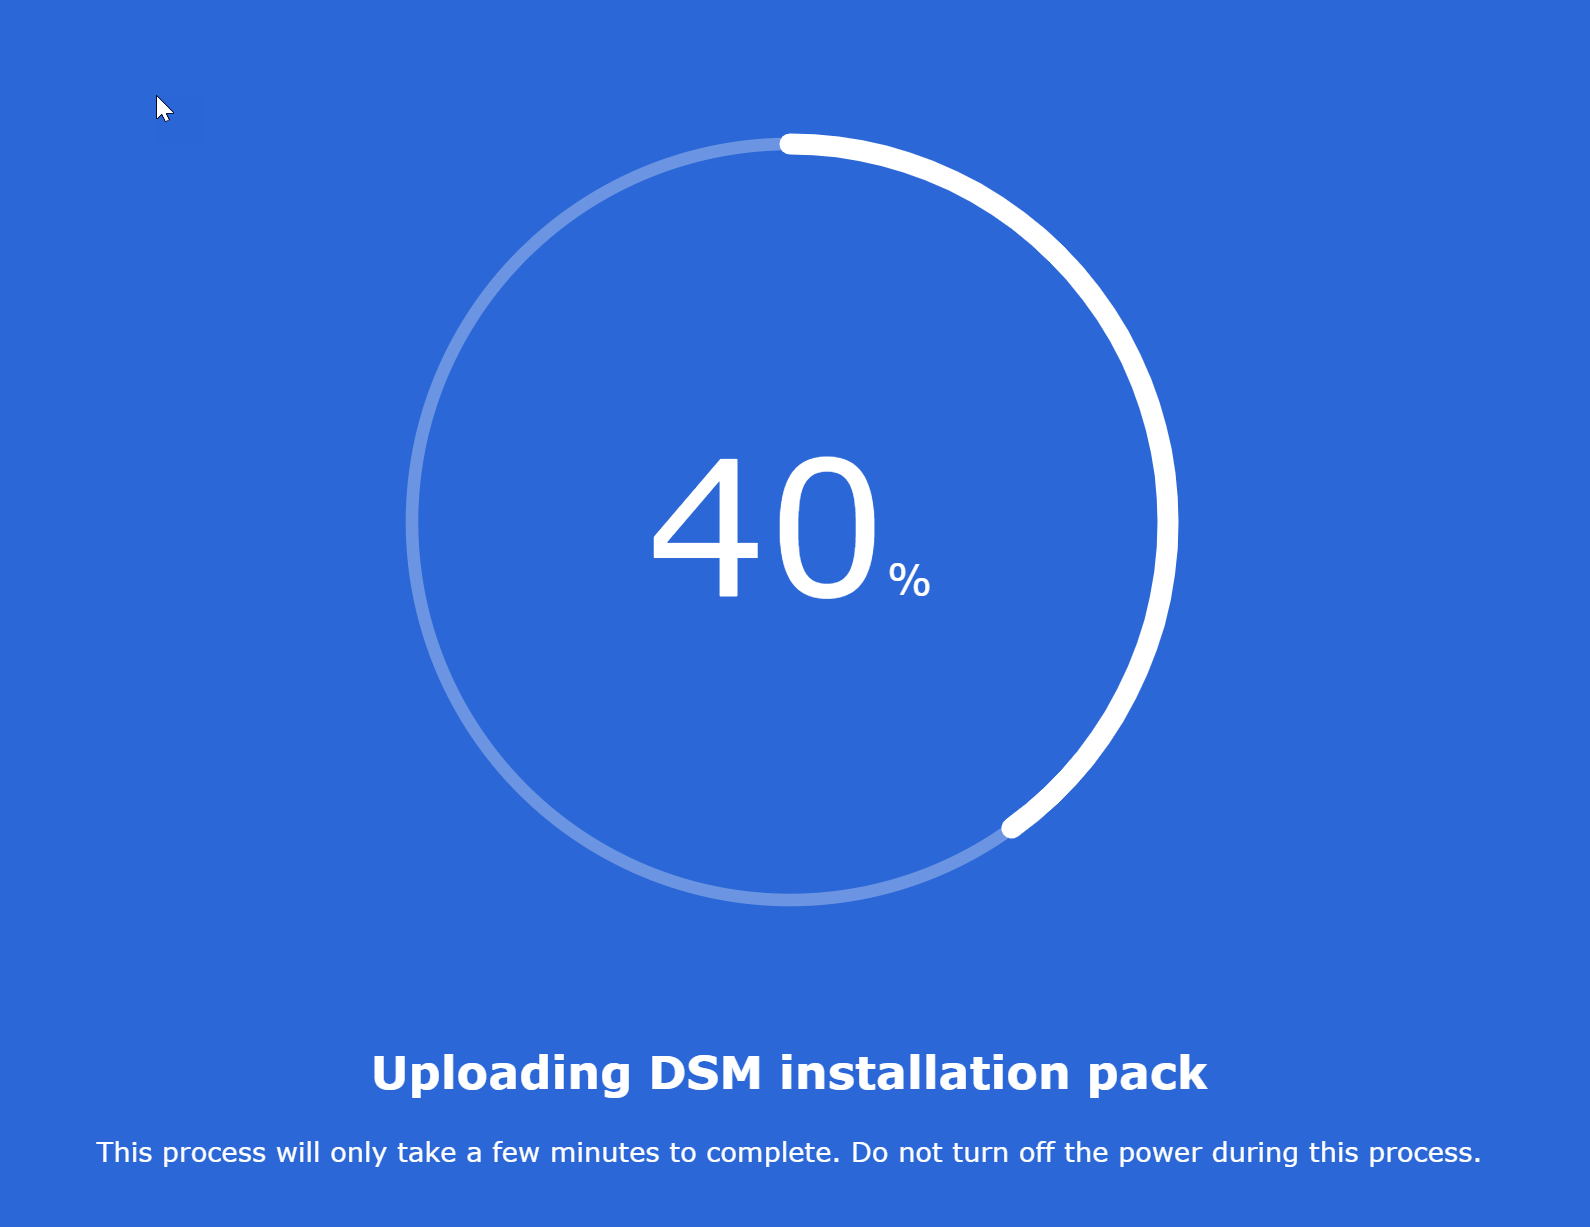](https://wiki.kyluat.com/uploads/images/gallery/2025-01/nVLimage.png)
Đi pha cà phê và đợi cho cài đặt xong thôi ...
[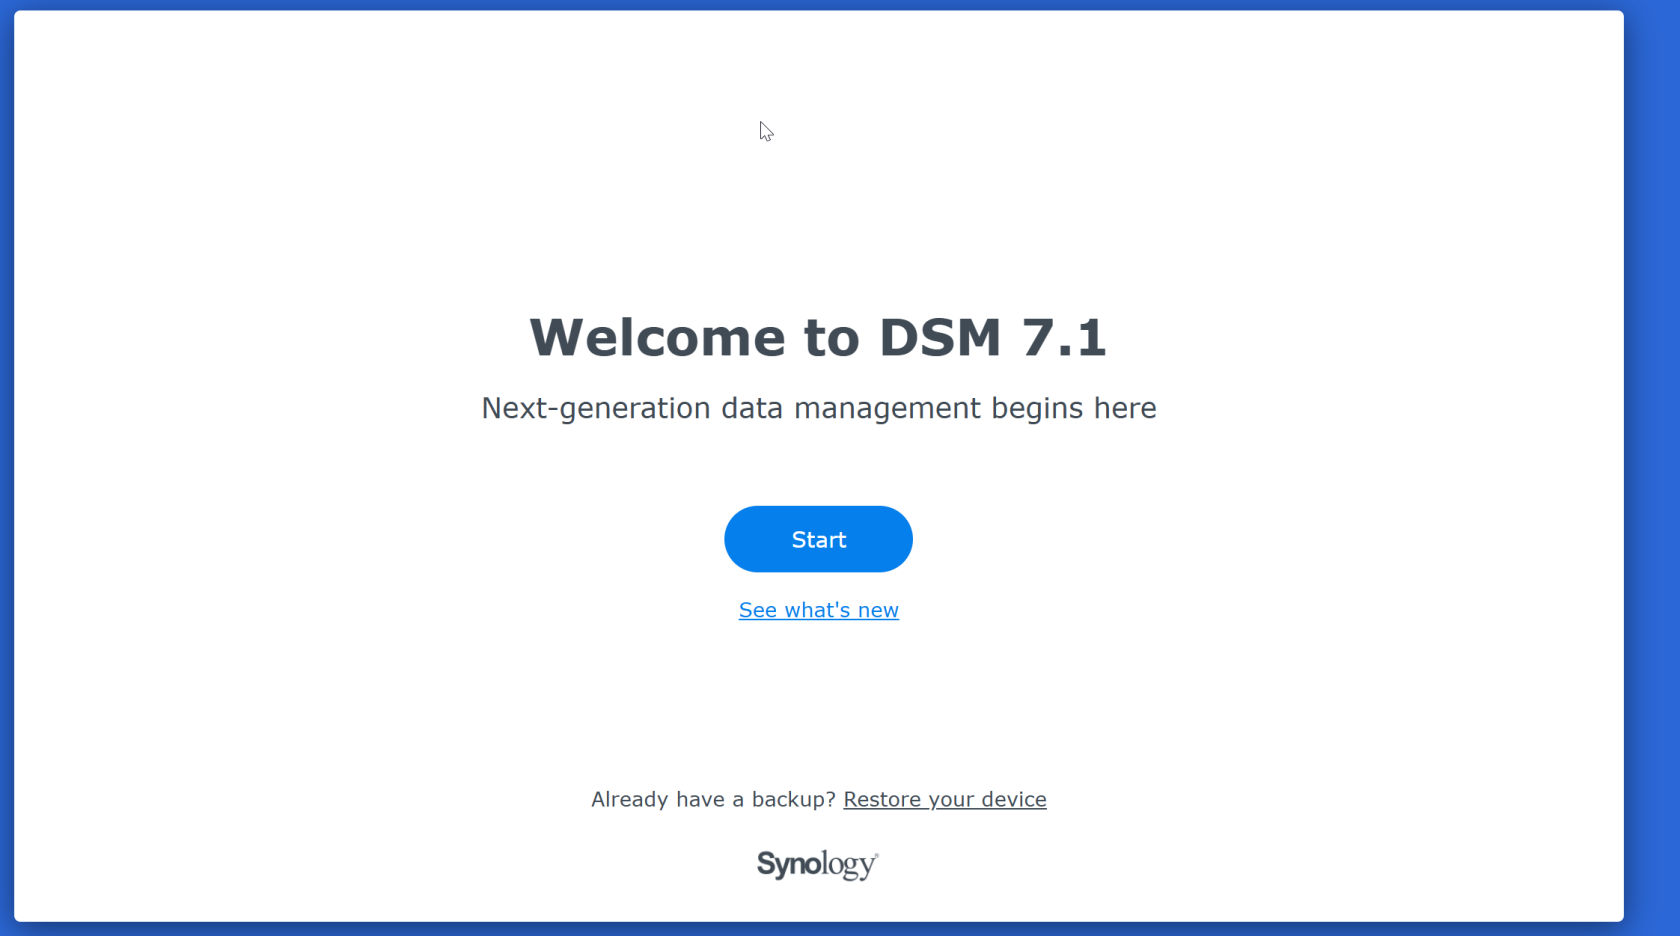](https://wiki.kyluat.com/uploads/images/gallery/2025-01/vKpimage.png)
[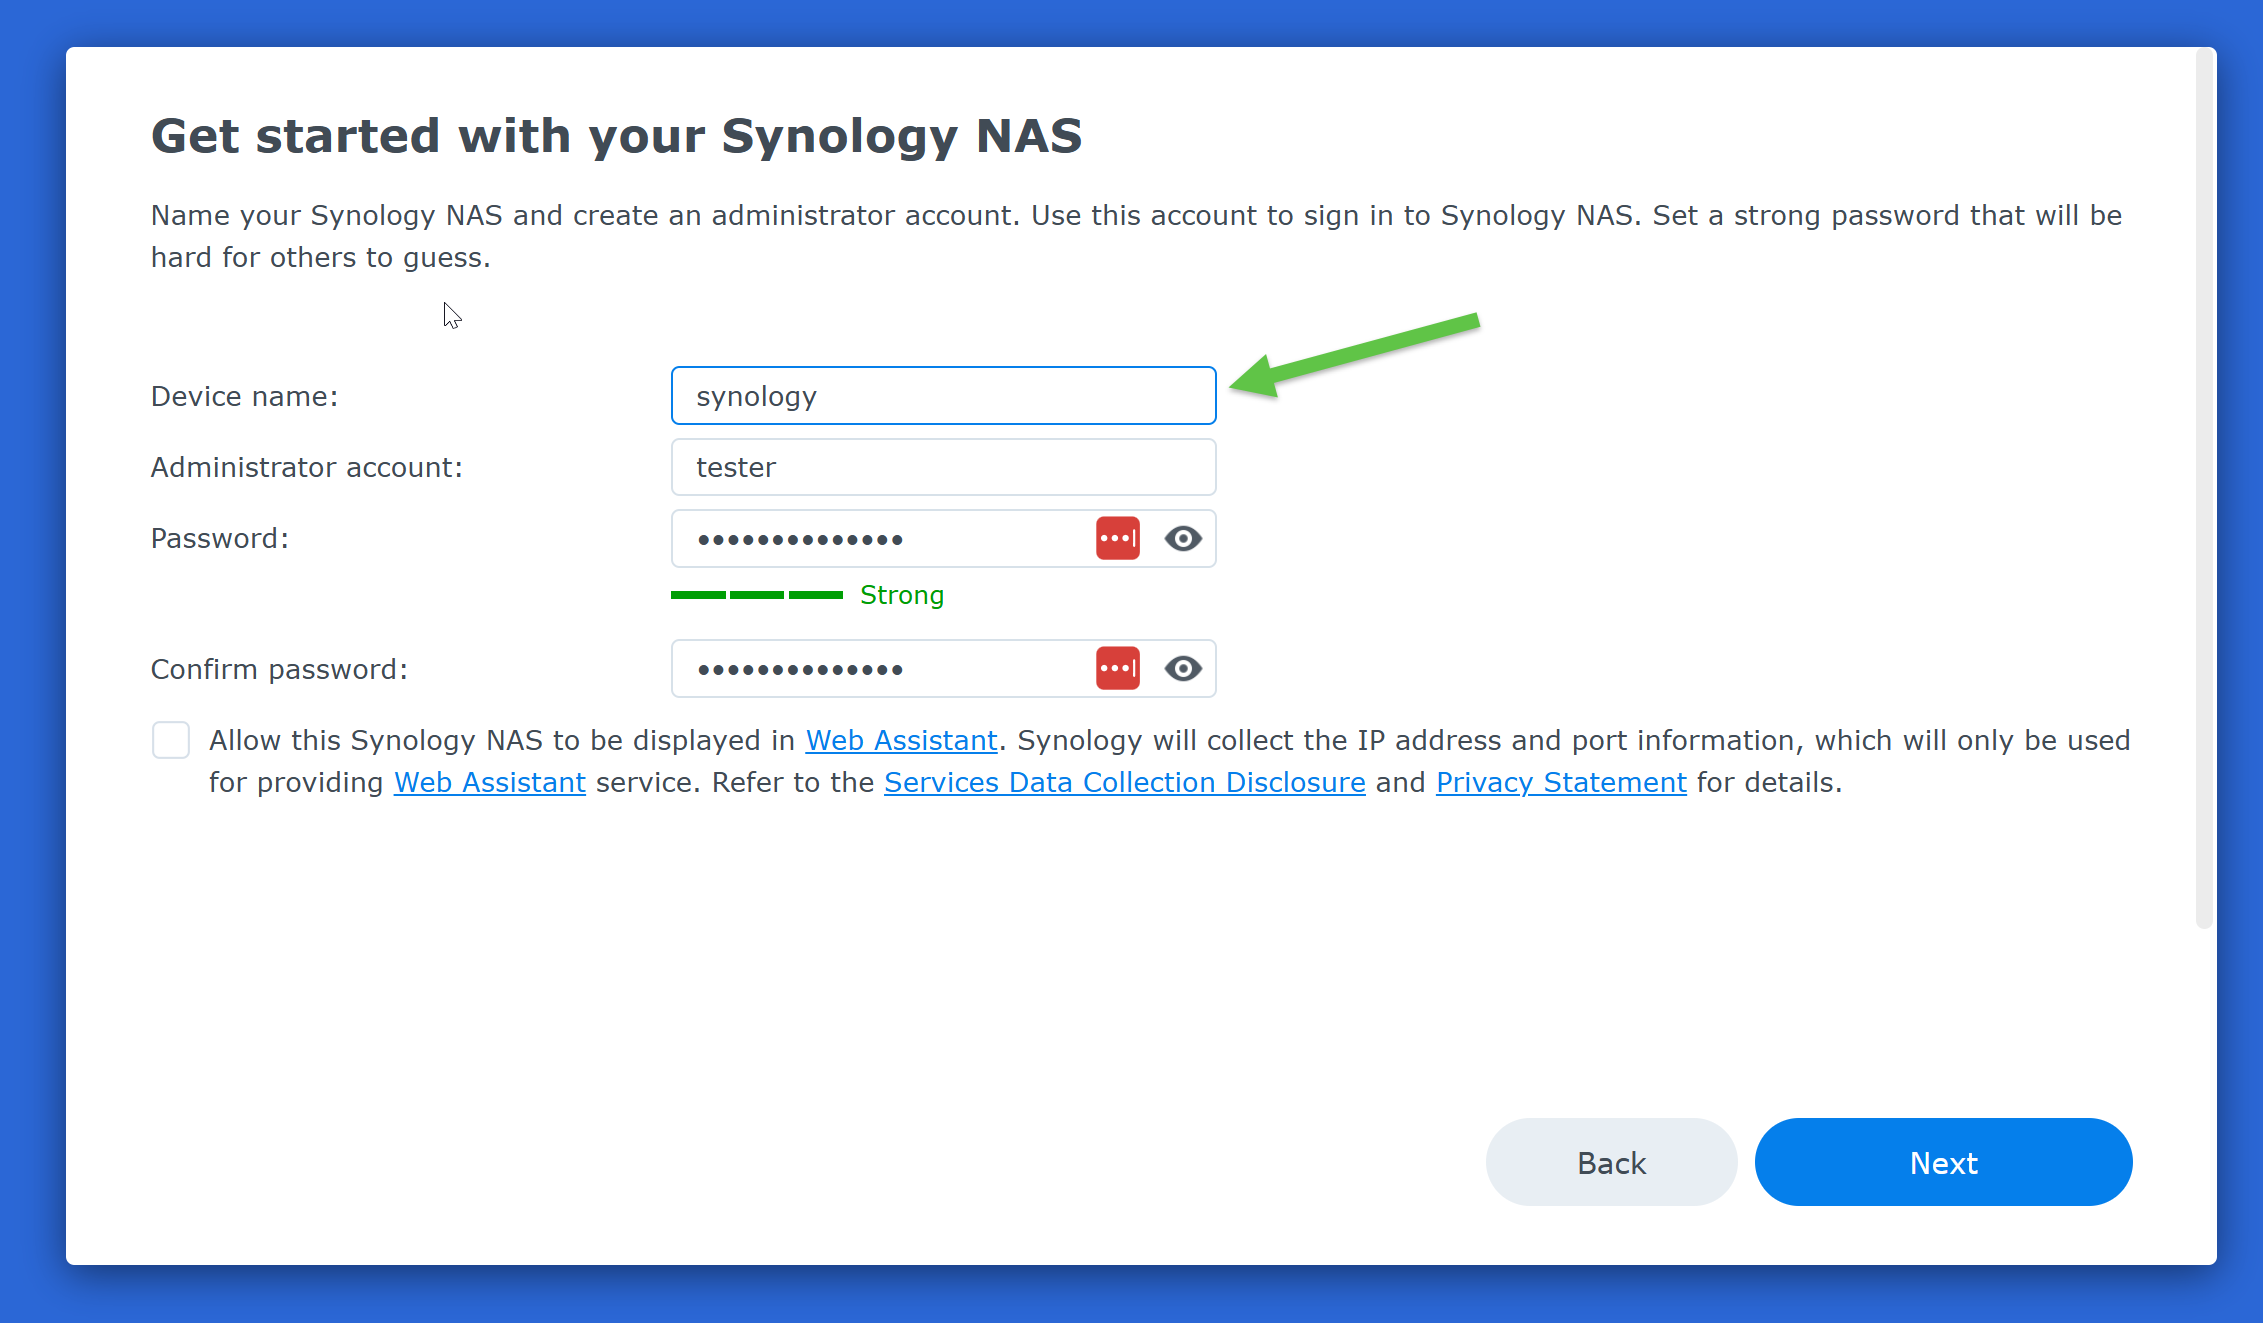](https://wiki.kyluat.com/uploads/images/gallery/2025-01/4KKimage.png)
Device name này để hiển thị xung quanh network. ví dụ nếu đặt synology thì access //synology trên window explorer nó sẽ ra trang website synology.
[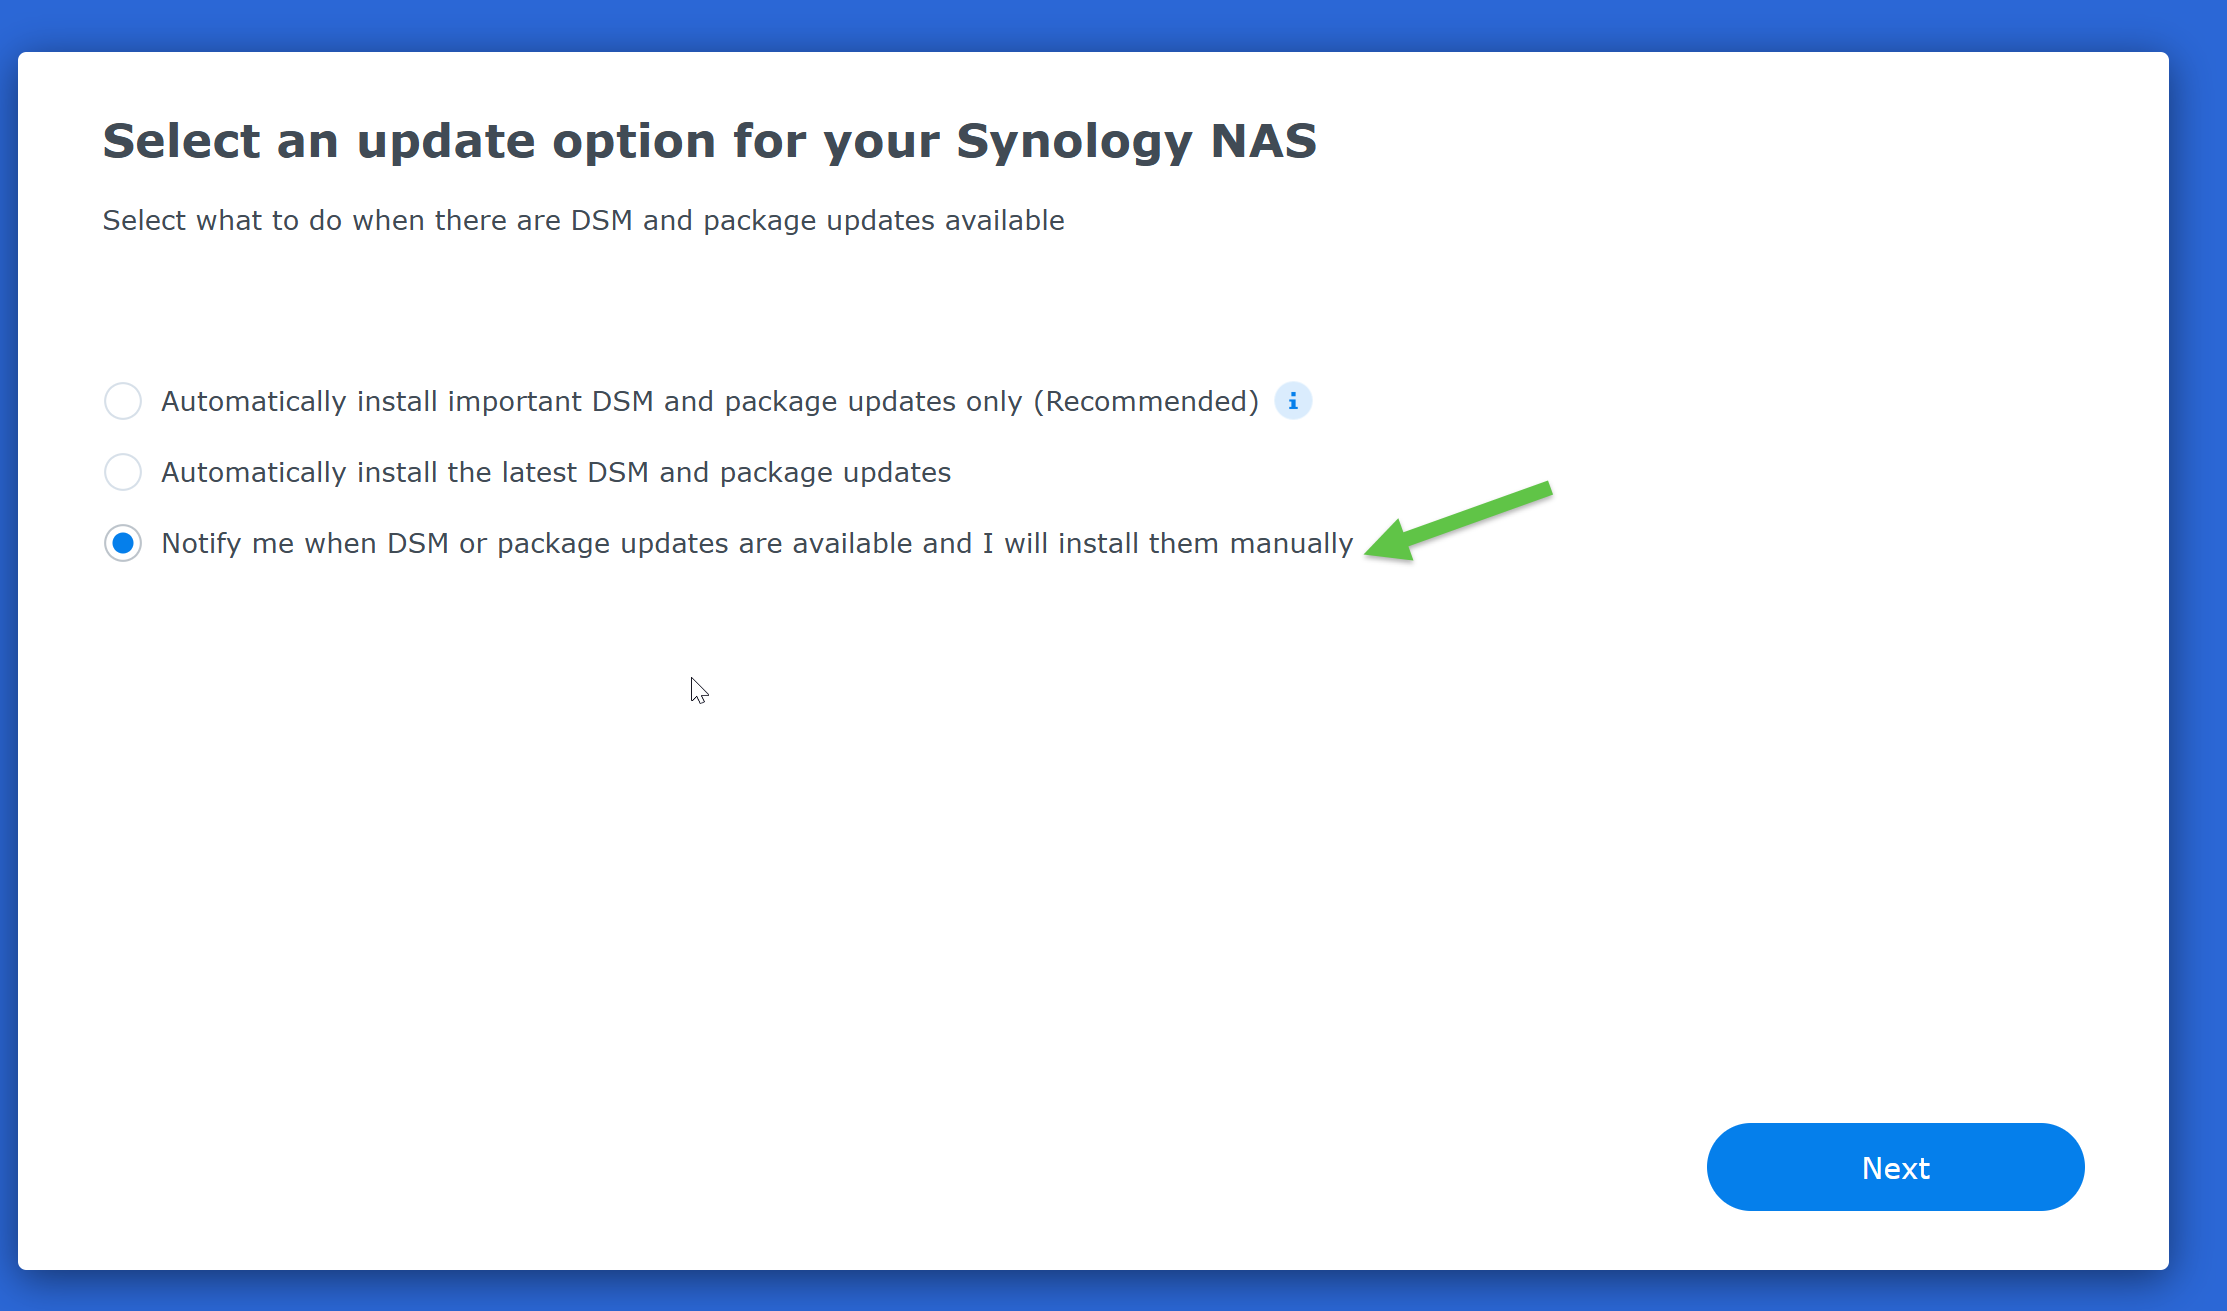](https://wiki.kyluat.com/uploads/images/gallery/2025-01/Rsrimage.png)
Kế tiếp nhấn Skip...
Kế tiếp cứ nhấn submit , khỏi agree .
[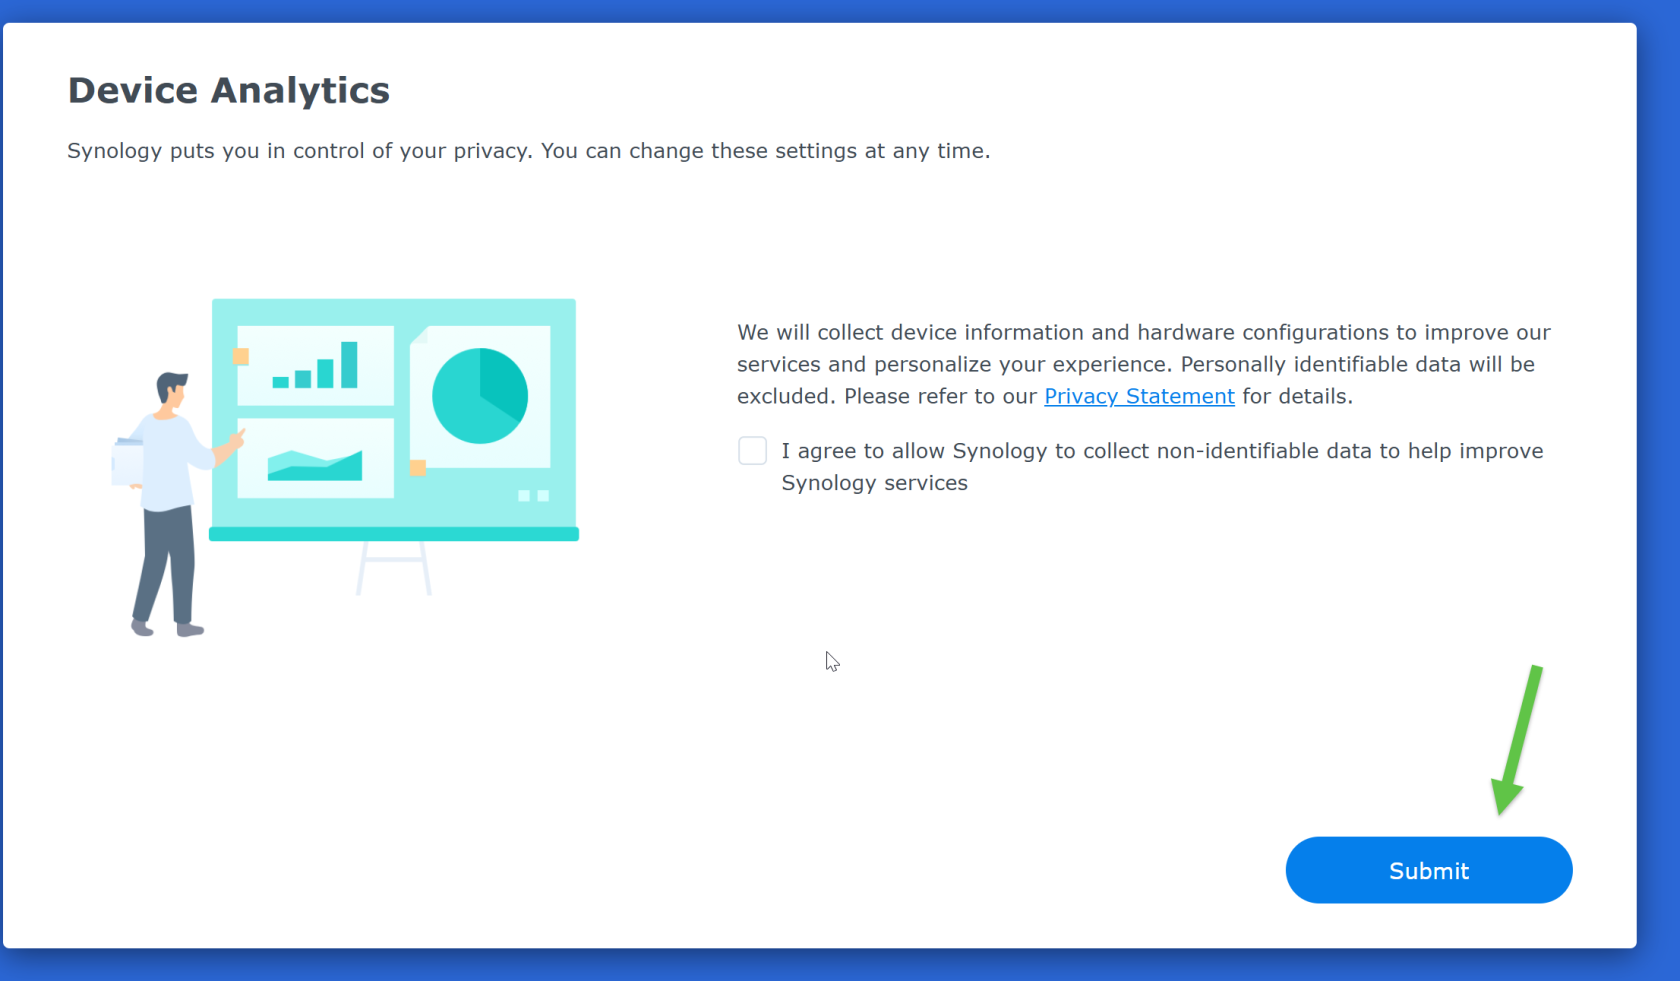](https://wiki.kyluat.com/uploads/images/gallery/2025-01/TY5image.png)
Done nhé
[](https://wiki.kyluat.com/uploads/images/gallery/2025-01/QFTimage.png)
Nếu sử dụng mạng lan 10GiB thì shutdown VM rồi chỉnh lại phần network trong hardware tab:
[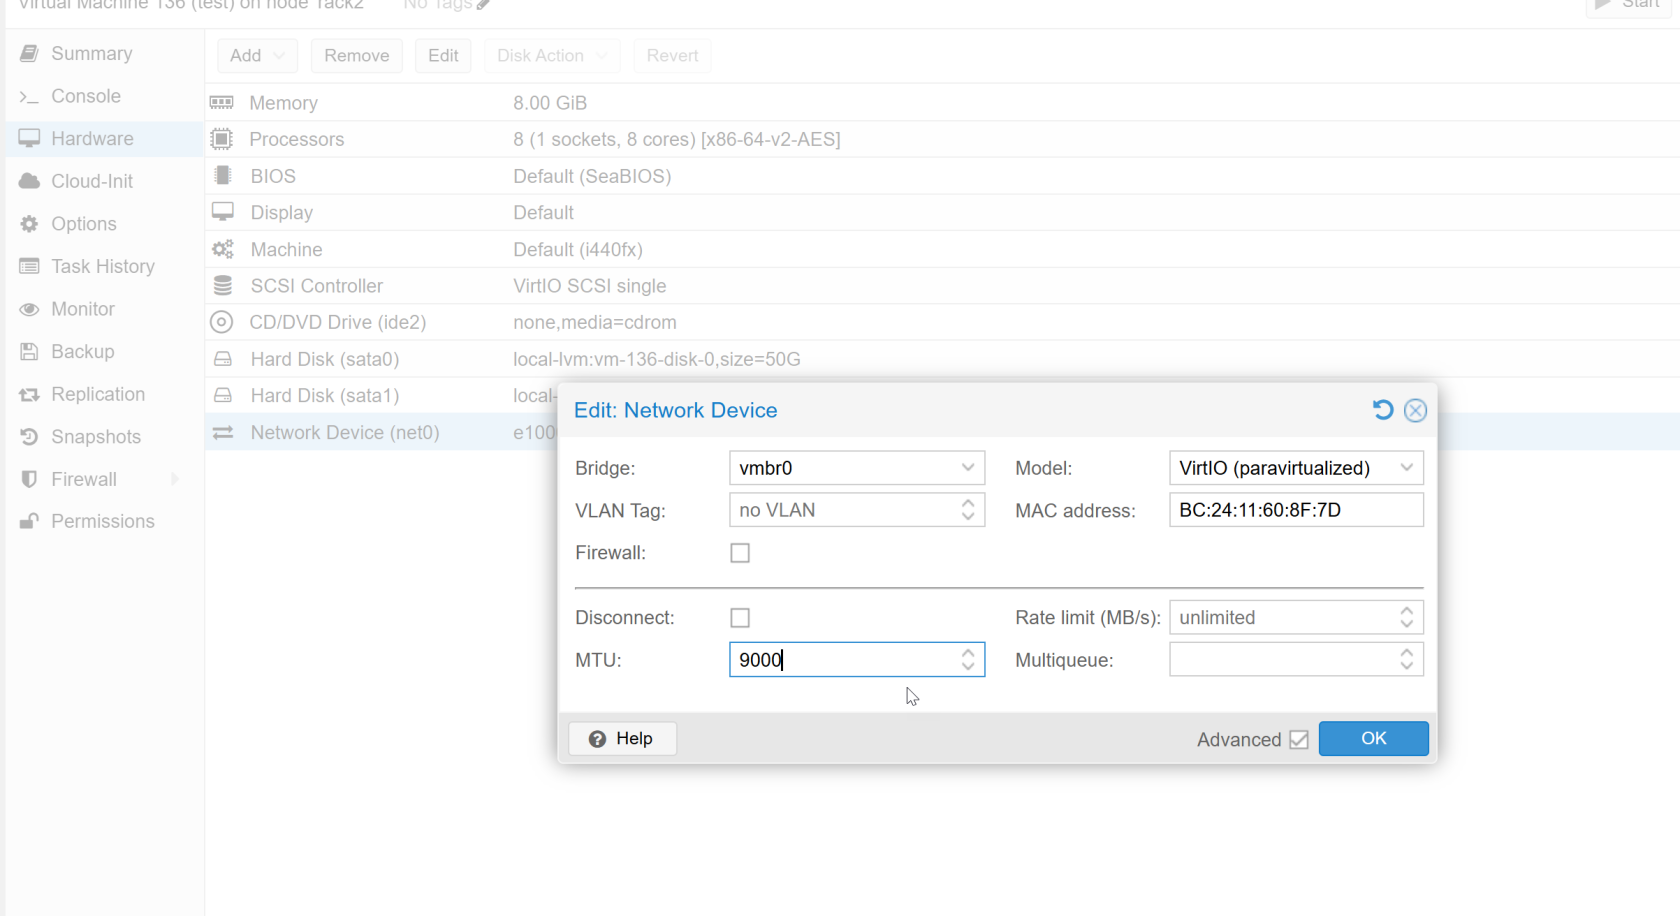](https://wiki.kyluat.com/uploads/images/gallery/2025-01/63Oimage.png)
Model: VirtIO
MTU: 9000
OK
start lại VM
...
Còn muốn cài đặt perf3 để test thì search google **how to install iperf3 on synology**